Wednesday, December 4, 2013

Mushrooms!

Hello Everyone,

First just a quick reminder about our up and coming Get Together/Book Swap Meeting on Saturday, December 7th at The Chancery in Wauwatosa, from 10:30 - Noon.  It should be a lot of fun.

Here's the link to The Chancery's website:  www.thechancery.com


I  thought I would also share one of my image making processes for a new book I'm creating on cartoonish mushrooms.

Part of the idea for this process came from a post on Pinterest about negative painting.  (I have put a tutorial on the Binders Guild Pinterest page.)


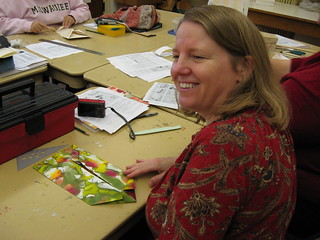
This is the finished page.

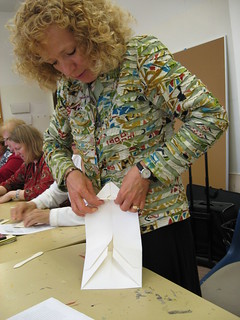
I started by creating a monotype with acrylic paint.  You will need to work very quickly, so it helps to set up everything in advance, a plastic sheet, several containers and brushes, lots of already pre-cut paper,  (I am using a medium weight (140lb) Strathmore Drawing Paper.) and a space to put the finished prints so they can dry.  Then you can start mixing your paints.


I used acrylic paint that was thinned to almost a water or ink consistency.


Then using my handy plastic sheet, I painted several color across the surface.

Working very quickly, I put my paper on top of the paint and just using my hand applied gentle pressure to the back of the paper.


The more paint you apply and the faster you will determine the intensity of the final product.  Since I knew these were to be for background texture,  I didn't want them too dark all over.  

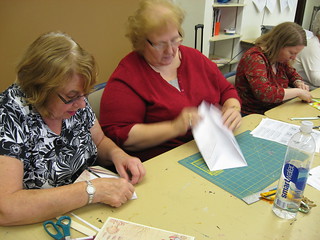
Here's some others I did that day -


It does help if you have your cut and ready to go.  The process goes really fast, and it's fun to play around with strokes and colors to see what kind of effects you can create. 

After the print dries you are ready to move on to the next phase.  With pencil, you'll want to draw your image on the print.


Then you will want to move on to the negative painting.  Using glazing medium and liquid acrylic paint-


You'll want to create a thin glaze with the medium and the paint.   Then paint over all the parts except those that will show only the background printing.  (For me, I decided to leave only the circles inside the front mushroom as the background.)


I let that dry and added a second and third coat of glaze.  Once again, you have to decide what will be covered with glaze.  The glaze dulls the texture and value.


After the glazes had dried, I used some Caran D'ache water soluable crayons to add in some highlights and push the color further.  After that dried I added some definition and details with black ink.


The final step was to add just a bit of color with acrylic paint.


I'm doing several different kinds of mushrooms with the same technique.  I will bring them to the meeting in January.  In the meantime, I'm looking forward to our book swap.

See everyone there!


Quote of the Week:  "I couldn't wait for success, so I went ahead without it." - Jonathan Winters


Monday, November 11, 2013

November 9th Meeting Wrap Up

Thanks to everyone who came on Saturday.  It was a great meeting.

Here's just a sample of what we shared:

Kathleen Kelly brought her Canadian Rockies book, using Hedi Kyle's Crown Binding Book:


Our next meeting is scheduled for December 7th.  We are thinking it will be at the Chancery in Wauwatosa.  There will be a blog post with the exact place, time and date.  So stay tuned!

At our December meeting we will be having a book exchange.  The book can be anything 4" x 5" and under.  Please wrap it up like a present.  Creativity in both book and wrapping is encouraged.  

For those unable to attend in December, our next working meeting is January 11th, from 10 to Noon at Mount Mary.  Nancy Lohmiller will be demonstrating an Accordian Book with Pocket.  Supply list will be announced later.

In January we will also begin with a new theme project.  It will be the 4 seasons, so we will begin with Winter.  The book will not need to be completed but bring any ideas you may have on the theme.

We also have a schedule for next year's meeting, so save the dates:

January 11th
February 8th
March 8th
April 12th
May 10th

All meetings will be from 10 to Noon at Mount Mary.

Quote of the Week- "To see the Earth as it truly is, small and blue and beautiful in the eternal silence where it floats, is to see ourselves as riders on the Earth together, brothers on that bright loveliness in the eternal cold - brothers who know now that they are truly brothers."  Arichibald MacLeish

Tuesday, October 29, 2013

October 2013 meeting photos + recipe

Photos from the Binders Guild October 12 2013 meeting are on Flickr here. Christine showed us how to make Hedi Kyle's Diagonal Pocket Folder booklet.  Sheila has posted the tutorial here.
 IMG_6679IMG_6677 IMG_6678
 Our next meeting is November 9, 2013.

Here is the recipe for Tomato Spice Tea Bread that I used to make the mini-muffins I brought:  

Ingredients:
2 cups flour
1 Tablespoon baking powder
1/2 teaspoon salt
1 teaspoon cinnamon
1/3 cup vegetable oil
1/2 cup sugar
1/2 cup dark brown sugar (packed)
2 large eggs
1 pound tomatoes, peeled, seeded and pureed to make one cup
1/4 sliced unblanched almonds (optional - I never have them on hand)

Directions: Preheat oven to 350 degrees and butter and flour a 9×5 loaf pan. Combine the flour, baking powder, salt and cinnamon in a bowl and mix. Combine the oil, sugars, and eggs in a large bowl and beat with mixer until fluffy, about 3 minutes. Beat in the pureed tomato. Gradually add flour mixture, blending well after each addition. Pour the batter into the loaf pan and sprinkle top with almonds if you're using them. Bake for 50 to 60 minutes, until knife inserted into center comes out clean. (If you are making mini-muffins reduce cooking time to 20-30 minutes - you may have to experiment.) Transfer to rack to cool for 5 minutes, then remove bread and continue to cool on rack.

Creating Hedi Kyle's Diagonal Pocket Fold Book

Hello everyone!

Sorry for the delay, this is from our October 12th meeting.  (Sick child at home.)  

We had a great meeting on the 12th.  A big thank you to Chris Klein who demonstrated our book selection this month.  And a thank you to Carolyn for the Spicy Tomato Muffins!  They were delicious.

Here's what we did to make Hedi Kyle's Diagonal Pocket Fold Book:

Materials:
                  For folder:  12" x 20" text weight paper
                  For signatures:  3 - 6 sheets of 
                                            5 1/2" x 8" paper folded in half

Ruler
Pencil
Bonefolder
Awl
Needle
Thread

Step 1: The folder

Put the 12" x 20" face down and measure and mark the center of the 12" side of the paper.  Fold each side to the middle mark.  It will look like this:


Then unfold and keeping it vertical, you need to make a mark 8" up from the bottom and fold the bottom up to that mark.  You will need to fold that fold over two more times.  So you will have three 4" folds on one end of the paper.

From there, you need to reverse fold the #2 fold up to #3.  Hopefully you can see it in this picture. 


Now, (see picture above) fold both corner to the first vertical long folds.

You then need to take those folds and flip them up, so the corner folds you just made will be facing down.  

You will need to fold the bottom corners in to the horizontal folded line.  (My picture isn't too good, but I'll show it.)


Flip the horizontal fold down, over the two corner folds you just made.  


Refold sides to the middle along those first long vertical folds.  When you turn it back over, it should look like this:


That is one side.  Now you will need to fold the other side.

Fold the two corners to the middle.  Then fold the middle edge up, so that it aligns with the edge of the paper.


You will need to take a bone folder and score the edge of the last fold, like this:


This step is very hard to explain.  Unfold the last two folds and sticking your finger inside, pop the fold out and flatten it along the scored line into a kite shape.  Hopefully pictures will help.


Tuck the two ends into each other.


Tuck the top edge of that inside.  So the edge looks like a triangle.


Now you can fold it into a folder.  Using the edges of the pockets as your guide.


Then fold over to form the folder.


Next, you will want to sew in your signatures.  Start by piercing three holes (about an 1" apart) into your signatures.


Then you will need to align the signatures on the inside folder and pierce holes through the folder.  Using a simple pamphlet stitch and waxed thread sew in your pages.


I did the tie on the inside, but you can choose to put it on the outside, simply by changing where you start your stitch.

And the booklet is complete!


I did take a picture of the insides folds.


Thanks again to Chris.  This was a great book.  Very inspiring.
Thanks too, to all who came and shared.

Save the Date!  Our next meeting is November 9th.

Quote of the Week:  "When my kids become wild and unruly, I use a nice, safe playpen.  When they're finished, I climb out." - Erma Bombeck


Sunday, October 6, 2013

Hand Printed Paper

For my book project next week I decided to hand print some paper.  So here's my inspiration for you:

I took Pinata Inks, Strathmore drawing paper, a piece of old plexiglass:


The plexiglass doesn't really show up in the photo but its there.

Then I drizzles the ink over the surface of the plexiglass.  It has kind of a water effect.


You do have to make sure you put on enough ink and work fast because the ink has a short drying time.  I also did put on a few drops of retarder to help with the drying process.  

Then just carefully put your paper on top of the ink.  The ink should absorb into paper, so you print both sides at once:


You will also need to make sure the you carefully press on the paper to make sure it absorbs all the way in.


Then you remove it from the plexiglass and let it dry and here's the result:


It's very organic and I think it will look interesting with the Diagonal Pocket Folder book that we are going to make at our meeting Saturday, Oct 12th.

See everyone then!

Quote of the Week:  "Though no one can go back and make a brand new start, anyone can start from now and make a brand new ending."  - Carl Bard


Monday, September 16, 2013

9/14 Meetings Meet and Share

We had a great meet and share meeting on Saturday, September 14th.  Thanks to everyone who came.  It was very inspirational to see what everyone has done.


                                           Carolyn Brady's interactive page


We also were able to decide on our next book project for October 12th's meeting.  It will be another Hedi Kyle origami structure - The Diagonal Pocket Folder.  This is essential a folder that signatures can be pamplet stitched into to create a booklet.  Below are some photos:


I will be posting the list of supplies you will need when they become available.

Quote of the Week:  "Every strike brings me closer to the next home run." - Babe Ruth

Sunday, August 18, 2013

Hedi Kyle's Blizzard Books or Crown Binding

Hello Everyone,

Sorry this took so long to write.  I had to pick my children up from camp last week and I was only able to make it to the last half hour of our meeting.  So with the quick help of Carolyn, I learned how to fold the book and then made a better sample at home for the blog and my own collection.

A big THANK YOU once again to Chris, who demonstrated and instructed everyone on how to make these books.

Book Version 1

Materials needed:
   Bone folder
   Page paper - 9 1/4" x 22"  (should be a light weight paper, double sided wrapping paper works well)
   Cover paper - 3 3/4" x 11"  (medium weight)
   *optional - 2 1/2" x 3 1/2" cards (ATCs work well)

This book is created simply by folding, so no measuring is required.  You do need to make sure you are folding straight.  And the weight of the paper does matter.  You want to use a paper that's thin, flexible and can hold a fold.  (Similar to origami paper)


Start the book, by folding the page paper in half.  Then fold each half in half.  And then each of those halves in half.  You will end up with something like this:


From there, you gather the folds up, like an accordion book.  Then fold the corners to the center:


It is each mountain fold that you will fold to the center.  After you do one side, repeat on the other.
You will end up with your page paper looking like this:


Make sure your reverse fold all your folds to make the next step easier.

Now unfold the entire page.   Starting with one side push the folds inward, as follows:


From there, you will fold each of those points down as far as where the diagonal meets the center fold:


Repeat for all points, then do the exact same thing on the other side.  You will end up with a structure that looks like this:


For the cover, it will tuck in the first and last slots.  For mine, I pre-folded card stock, leaving about 1/2" for the binding:


And here's a photo of how the cover fits in:


And here's my finished book:


You'll notice the page paper is showing a bit at the top and bottom.  That is because the paper I used (rice paper)  was a bit thick and I had to trim the cover a bit to get it to slide into the pocket.  You will need to play with it a bit depending on what paper you use.


Book Version 2

Materials needed:
   Bone folder
   Binding paper - 7 1/2" x 8"  (text weight paper)
   Page paper - 4 separate pieces, each 5 1/2" x 8 1/2" (text weight paper)
   Cover - 2 separate pieces, each 5 1/2" x 4 1/4"  (card stock)

The binding paper is folded in the exact same way that the page paper was folded in Version 1.  The difference is that it is smaller and requires a little more nimbleness.  What you will end up with should look like this:


Fold each of the page papers in half and then insert them into the point folds of your binding.


My picture was a bit dark, huh.  Anyways, once all four are inserted it looks like this:


I used four different papers for each of my pages.

Then glue one cover page to the front and back of your book.  Here's my finished book:


I will bring my books to our next meeting, if you would like to take a closer look.


Our next meeting is scheduled September 14th.  Keep the dates open for October 12th, November 9th and our "Trade a Book" day on December 7th.

Also, there is a lot of information to share this week, so I will be writing a few posts this week.  
Stay tuned  :)

Quote of the Week:  "He that can have patience can have what he will." - Benjamin Franklin