Friday, January 31, 2014

Pocket Accordion Bond Book

Hopefully everyone is surviving the long winter.

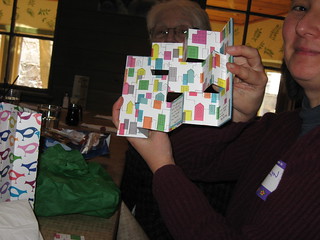
Here are the instructions for the second book we created at our last meeting - the "Pocket Accordion Bond Book".

*Just a quick note - I have changed the sizes to fit the book I was doing.  These will be different from the ones on the instructions Nancy handed out.


Supplies:

For Outside cover - one 2 3/8" x 11 1/2" paper sheet
                                There will be an accordion fold in this sheet, so 
                                choose paper that's not heavy and can fold and 
                                hold easily.


For Inside Pages - six 3" x 5 1/2" sheets of paper.  Once again, not 
                              too heavy.

You will also need -
                                Ruler
                                Bone folder
                                Pencil
                                Glue


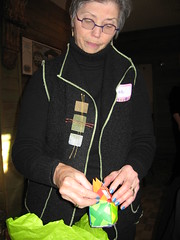
Start by gathering materials -


Fold the 6 inside pages first.  

Starting with the paper in a horizontal position,Measure 1" up from the bottom of the page and score a line across the whole sheet.  


Then fold the bottom edge up.

Keeping the bottom edge fold, fold each sheet in half vertical, so the horizontal fold is to the outside.

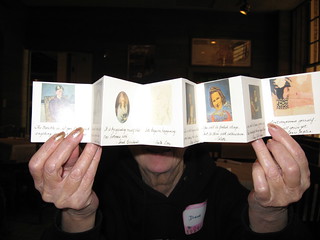
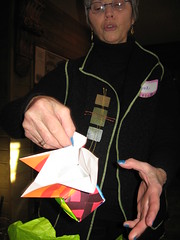
You will need to do this with each of the 6 pages.  When you get done, they'll look like this - 


Sorry for the blurry photo.  Hopefully you can somewhat see what they should look like.

Set those pages aside.

Folding the cover - 

With your 2 3/8" x 11 1/2" paper in the horizontal position, starting from the left side of the paper, measure and score a line 3" from the edge.


Then starting at the 3" mark, measure and score 12 lines - 3/8" apart.  This will be for the accordion fold binding.

Take your time measure and scoring.  This binding is not very forgiving and things can get wonky if the measuring and scoring isn't precise.

After the 12th scored line, measure 3 inches and score again.

After score you will want to fold.  Valley…Mountain…Valley….Mountain…etc.  (See diagram below)


You will have some extra at the end.  I'll come back to that.

Next, its time to center (I just eye-balled it) and glue the each side of inside pages (that you folded earlier) to each side of a mountain fold.


Make sure the pocket is facing in the right direction.  Not just that it is on the outside, but also that it is on the bottom and not the top.


You will notice that the inside edge of the pocket is not glued down.  


You can glue it now if you wish or leave it as is.  You could even fold or cut a decorative edge to it.


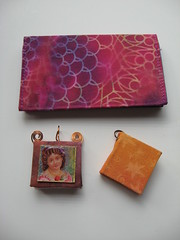
After the book is completely glued,  you can choose what to do with the left-over edge of the cover.


You can cut it off and align the front and back covers or what I did was to make 2 additional score and folds and create a folded closure for the book.


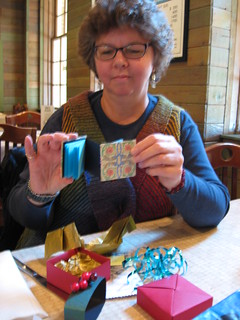
Thanks again to Nancy for demonstrating!


Quote of the Week - "I always wanted to be somebody, but now I realize I should have been more specific." - Lily Tomlin


Sunday, January 26, 2014

January Meeting Minutes

The polar vortex momentarily froze my brain, but I was finally able to dig out.  Here are the meeting minute highlights from the January 11th meeting - 


Once again a big Thank You! to Nancy for demonstrating the Tri-fold with 2 Accordion Panels Book and the Pocket Accordion Bound Book (look for the demo blog post on it later this week).

For our next meeting, please create a book design using one of the forms.  The subject matter is up to you.  

We have also started a Seasons Group Book.  That is a book that will be composed of pages from all the members.  We would like everyone to create an 8.5" x 11" spread for each of the seasons, Spring, Summer, Fall and Winter.  The book will eventually be 8.5" x 5.5".  You will need to make one copy for everyone in the Group (so approximately 20, the exact amount will be determined at our next meeting).  At the beginning of next year we will create a book from all the pages we collected over the year.  The first page - Spring - will be due at the meeting in April.  If you have any questions, please write them down and we can discuss it at the February meeting.

Speaking of the February meeting, it will be on Saturday, February 8th from 10am  - Noon.  This will be a Show-and-Tell Day.  So along with your book using one of the Accordion forms, please feel free to bring any other  projects to show.

I will also be doing a very informal demonstration of negative painting technique.  I will have all the supplies necessary to make a small reference that will hopefully will inspire your creative juices.

A quick reminder that our show is quickly approaching.  We will schedule some meeting during the summer months for anyone needing help or advice to finish project, take photos, etc.  Those meetings will also include decisions about the show - postcards, catalog, date for opening, etc.

Also I have added our Pinterest board link to the blog.  Please check out all the interesting and unique projects that are pinned.

I'm looking forward to seeing everyone in February!


Quote of the Week -  "Winter is on my head, but eternal spring is in my heart." - Victor Hugo

Wednesday, January 22, 2014

Tri-fold Book with 2 Accordion Panels

It was great to see everyone at our first meeting of the year.  We started off with a bang by creating two different accordion fold book structures.  A big THANK YOU to Nancy for putting instructions together and demonstrating.

I am going to start with the easier of the two… 

"Tri-fold Book with 2 Accordion Panels"

Supplies:
     For Cover - one 16" x 7" paper 
     For Inside Panels - two 18" x 6 1/2" papers

            The papers for both the cover and the inside panels should   
              be of study weight, but not so heavy that it can not easily 
              fold.

You will also need:
     Ruler
     Glue  (preferably PVA, but if your just creating a practice book
                  using a glue stick would work)
     Bone folder


Score and fold paper at 5", 5 1/2", 10 1/2", 11"


Above, is what the finished cover should look like after you score and fold all the measurements.  (If it looks familiar it's because I used a remnant of my previous paper for the cover of this book.)


Next, you will want to score and fold the inside panels.

Each panel is 4 1/2" wide.  But it's easier to just take each of the 18" sheets fold them in half and then fold each half in half again.


After both inside pages are folded, you will center and glue one accordion panel to the left side of the cover.  Making sure that the panel pulls out to the left.

Then center and glue the second 5" panel to the right side.  Making sure this panel pulls out to the right.  

Here's my book with the panels folded - 


 The last 5" panel becomes the cover.  So when it's closed up it looks like this - 


Nancy was also able to share with us the book she created with the Tri-fold with 2 accordion panels book and Artist Trading Cards from various artists - 


Thanks again Nancy for the demonstration.

I will put up the other book form we created, the "Pocket Accordion Bond Book" as well as notes from the meetings in other blog posts.

Quote of the Week - "I do an awful lot of thinking and dreaming about things in the past and the future - the timelessness of the rocks and the hills - all the people who have existed there.  I prefer winter and fall, when you feel the bone structure of the landscape - the loneliness of it, the dead feeling of winter.  Something waits beneath it, the whole story doesn't show."  - Andrew Wyeth

Sunday, January 5, 2014

December 2013 Book Swap Photos

Happy New Year!  On December 7, 2013, we had our end-of-year meeting, which included brunch at the Chancery in 'Tosa and a handmade book exchange. (We picked numbers to see who got whose books, and I hope I noted down everyone's correctly.)

Nancy got Sheila's "Twelve Days of Christmas" pear-shaped accordion book.
 IMG_6869
Sheila got Diane's:
IMG_6872
Diane got Kathleen's:
IMG_6871
Kathleen got Nancy's:
IMG_6877
Kate got Suzanne's origami structure (and this is Suzanne demonstrating how it opens, because Kate had not been able to make it to the meeting but had sent her book with Peggy):
IMG_6879IMG_6880
Suzanne got my mini-book pendants (which I admit had been made some time previously but used handpainted & sunprinted fabric and gelatin print paper that our group had made several years ago). She is holding the sunprinted fabric business card holder sleeve I wrapped them in:
IMG_6878IMG_6856
I got Peggy's:
IMG_6870
Peggy got Kate's:
IMG_6874

You can see more a few more photos on Flickr here: http://www.flickr.com/photos/vintagepix/sets/72157604596043683

Our next meeting will be Saturday, January 11, 2014. Please bring the books you got in the holiday swap for show-and-tell for those who missed the December meeting.